How to Make Gense Dessert Cup in 5 Easy Steps
Picture this: a dessert that’s as easy to make as it is stunning to serve. The Gense Dessert Cup is your answer to creating a no-bake, layered treat that balances creamy textures, crunchy graham cracker crust, and vibrant fresh fruit—all without breaking a sweat. Whether you’re hosting a last-minute gathering, satisfying a sweet craving, or looking for a kid-friendly recipe that adults will love, this dessert checks every box.
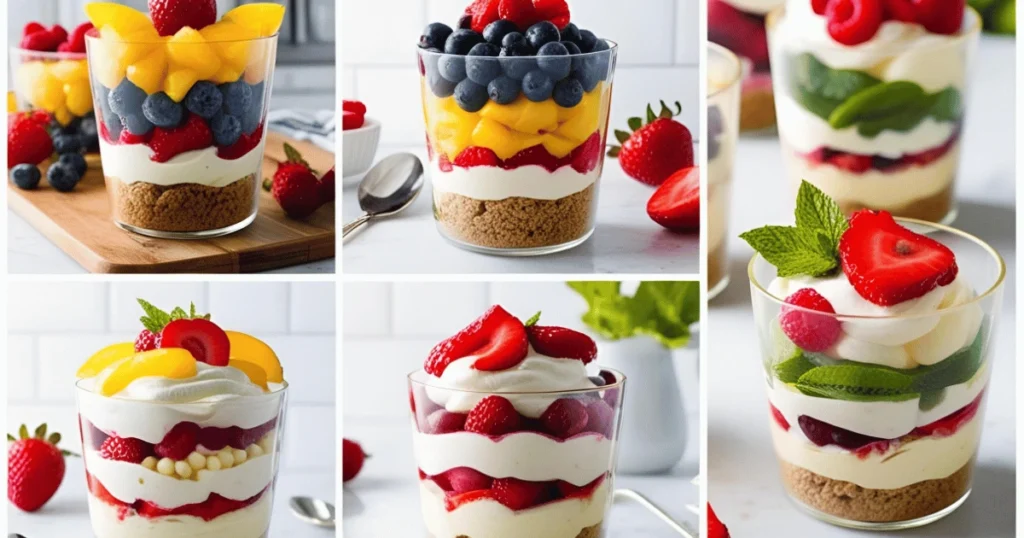
What makes the Gense Dessert Cup stand out? It’s a five-ingredient marvel built on simplicity. A buttery graham cracker base anchors a silky cream cheese and whipped cream filling, topped with juicy berries or your favorite seasonal fruit. The best part? You can assemble it in minutes, let it chill, and forget about it until showtime. No baking, no fuss, and no stress.
This recipe thrives on flexibility. Swap the crust for gluten-free cookies, use dairy-free cream cheese, or layer in dark chocolate shavings for a decadent twist. It’s a make-ahead dream, ideal for busy schedules or impromptu celebrations. By the time you finish reading, you’ll see why this dessert is a party staple and a family favorite—ready to adapt to your taste and time.
Let’s dive into the details and get those layers started!
2. Key Benefits
Why settle for ordinary desserts when the Gense Dessert Cup delivers extraordinary results with zero hassle? Here’s why this recipe deserves a spot in your culinary repertoire:
✅ Time-Saving & Effortless
No oven? No problem! This no-bake dessert comes together in 15 minutes of active prep. Simply layer, chill, and serve. It’s perfect for busy days or when you need a quick yet impressive treat.
✅ Customizable to Your Cravings
Swap ingredients to match your mood or dietary needs. Prefer a chocolatey base? Crush Oreos instead of graham crackers. Need a vegan version? Use coconut cream and dairy-free cream cheese. The layers are yours to play with.
✅ Healthy Tweaks Made Easy
Cut sugar without sacrificing flavor by using naturally sweet fruits like ripe mango or berries. For a protein boost, mix Greek yogurt into the filling. Even the crust can be nutrient-packed—try almond flour or dates for a guilt-free crunch.
✅ Kid-Friendly Fun
Let little hands help assemble the layers! The individual cups make portion control simple, and kids love choosing their own toppings—think rainbow sprinkles, mini chocolate chips, or banana slices.
✅ Make-Ahead Magic
Prep these cups up to 24 hours in advance. They’ll hold up beautifully in the fridge, making them ideal for parties, potlucks, or packed lunches.
✅ Crowd-Pleasing Presentation
Serve them in clear mason jars or elegant glassware to showcase the colorful layers. Add edible flowers or mint leaves for a restaurant-worthy touch that wows guests.
In short, the Gense Dessert Cup is more than a recipe—it’s a versatile, stress-free solution for anyone craving a delicious dessert without the work.
3. Ingredients
Here’s everything you’ll need to craft these irresistible Gense Dessert Cups. The recipe serves 6, but scales easily for larger crowds!
For the Crust
- 1 ½ cups graham cracker crumbs (about 10–12 sheets) – or swap with gluten-free cookies or Oreos.
- 6 tbsp unsalted butter, melted (use coconut oil for a dairy-free version).
For the Creamy Filling
- 8 oz cream cheese, softened (regular or dairy-free).
- ½ cup powdered sugar (adjust to taste; substitute with maple syrup or honey for refined sugar-free).
- 1 tsp vanilla extract (or almond extract for a nutty twist).
- 1 cup heavy whipping cream (or coconut cream for vegan).
For the Toppings
- 1 ½ cups fresh mixed berries (strawberries, blueberries, raspberries).
- Optional add-ons: Dark chocolate shavings, lemon zest, chopped nuts, or a drizzle of caramel.
Ingredient Notes
- Pantry Staples Shine: Graham crackers, butter, and vanilla are likely already in your kitchen.
- Fresh & Flexible: Swap berries with seasonal fruits like peaches, mango, or pomegranate seeds.
- Dietary Swaps: Use almond flour blended with dates for a grain-free crust, or fold Greek yogurt into the filling for extra protein.
With just five core ingredients and endless variations, this recipe adapts to your pantry and preferences effortlessly.
4. Instructions
Follow these five simple steps to build your Gense Dessert Cups. Even beginners can nail this recipe!
Step 1: Crush the Crust
- Process the crackers: Add graham crackers to a food processor (or seal them in a zip-top bag and crush with a rolling pin) until fine crumbs form.
- Mix with butter: In a bowl, combine crumbs with melted butter. Stir until the mixture resembles wet sand.
Pro Tip: Press a spoonful of crust into the bottom of each dessert cup firmly to prevent crumbling later.
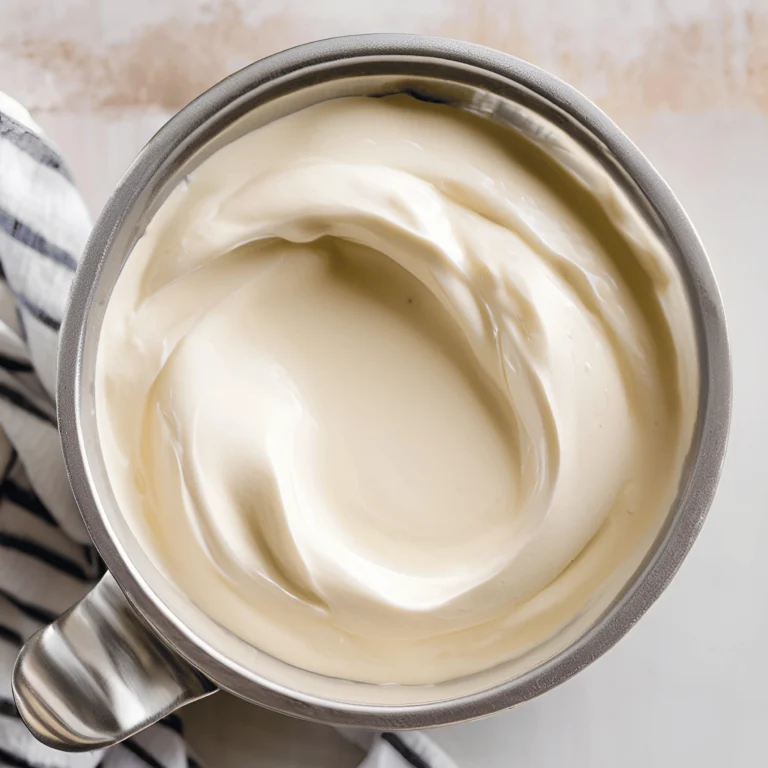
Step 2: Whip the Filling
- Beat cream cheese: In a large mixing bowl, use an electric mixer to whip softened cream cheese until smooth.
- Add sweetness: Gradually mix in powdered sugar and vanilla extract.
- Fold in whipped cream: In a separate bowl, beat heavy cream to stiff peaks. Gently fold it into the cream cheese mixture until fluffy and lump-free.
Pro Tip: For a lighter texture, chill the mixing bowl and beaters before whipping the cream.
Step 3: Layer the Ingredients
- Divide the crust: Spoon 2–3 tablespoons of crust mixture into each cup (6 total). Press down with the back of a spoon.
- Pipe or spoon filling: Add a generous layer of cream cheese filling over the crust. Use a piping bag for a polished look or a spoon for simplicity.
- Top with fruit: Finish with a handful of fresh berries or your chosen fruit.
Step 4: Chill to Set
Place cups in the refrigerator for at least 2 hours (or up to 24 hours). Chilling firms the filling and melds the flavors.
Pro Tip: Cover cups with plastic wrap if chilling overnight to prevent odors from seeping in.
Step 5: Garnish and Serve
Just before serving, add final touches like dark chocolate shavings, lemon zest, or a mint leaf.
Troubleshooting Tip: If the filling feels too soft, refrigerate it for 15 minutes before layering.
5. Pro Tips and Variations
Transform your Gense Dessert Cups with these expert tricks and creative spins. Whether you’re catering to dietary needs or just craving something new, these ideas ensure your dessert never gets boring.

Pro Tips for Perfect Results
- Crust That Stays Put: Press the crust mixture firmly into the cups using a flat-bottomed glass or measuring cup. This prevents crumbling when slicing into layers.
- Whip It Good: Chill your mixing bowl and beaters for 10 minutes before whipping cream. Cold tools = faster, fluffier peaks.
- Filling Fixes: If the cream cheese filling feels too soft, refrigerate it for 15–20 minutes before layering. For extra stability, add 1 tbsp cornstarch to the filling.
- Fruit Prep: Pat berries dry with a paper towel before adding them as toppings. This keeps excess moisture from making the crust soggy.
- Make-Ahead Magic: Assemble cups up to 24 hours ahead, but add fresh fruit and garnishes just before serving to maintain texture.
Flavor Variations
1. Crust Swaps
- Chocolate Lovers: Use crushed Oreos or chocolate graham crackers mixed with butter.
- Nutty Base: Blend almonds, pecans, or walnuts with dates for a chewy, grain-free crust.
- Ginger Snap: Swap graham crackers with spiced ginger snaps for a warm, zesty twist.
2. Filling Twists
- Citrus Zing: Add 1 tbsp lemon or orange zest to the filling for a bright, tangy kick.
- Chocolate Bliss: Fold ¼ cup cocoa powder or melted dark chocolate into the cream cheese mixture.
- Protein Boost: Replace half the cream cheese with Greek yogurt for a lighter, protein-rich filling.
3. Topping Ideas
- Tropical Vibes: Top with diced mango, toasted coconut flakes, and a lime wedge.
- Decadent Indulgence: Drizzle with salted caramel or hot fudge, then sprinkle with sea salt.
- Holiday Special: Use pomegranate seeds, crushed candy canes, or cinnamon-dusted apple slices for festive flair.
Dietary Adaptations
- Vegan: Use dairy-free cream cheese, coconut cream instead of heavy whipping cream, and maple syrup as a sweetener.
- Gluten-Free: Opt for certified gluten-free cookies or almond flour crust.
- Low-Sugar: Skip powdered sugar and blend dates or mashed ripe banana into the filling.
Texture Play
- Crunch Factor: Add a middle layer of granola, chopped pistachios, or cacao nibs between the filling and fruit.
- Silky Layers: Swap berries with a dollop of lemon curd or raspberry coulis for a saucy surprise.
Kid-Friendly Hacks
- Rainbow Cups: Let kids layer colorful candy-coated chocolates, sprinkles, or gummy bears on top.
- Dip-Friendly: Serve with a side of melted chocolate or strawberry sauce for dipping fruit pieces.
With these tips and twists, your Gense Dessert Cups can adapt to any season, diet, or occasion. Experiment freely—each layer is a chance to make this recipe uniquely yours!
6. Serving Suggestions
The Gense Dessert Cup isn’t just delicious—it’s a canvas for creativity. Here’s how to elevate its presentation and tailor it to any occasion:
Presentation Perfection
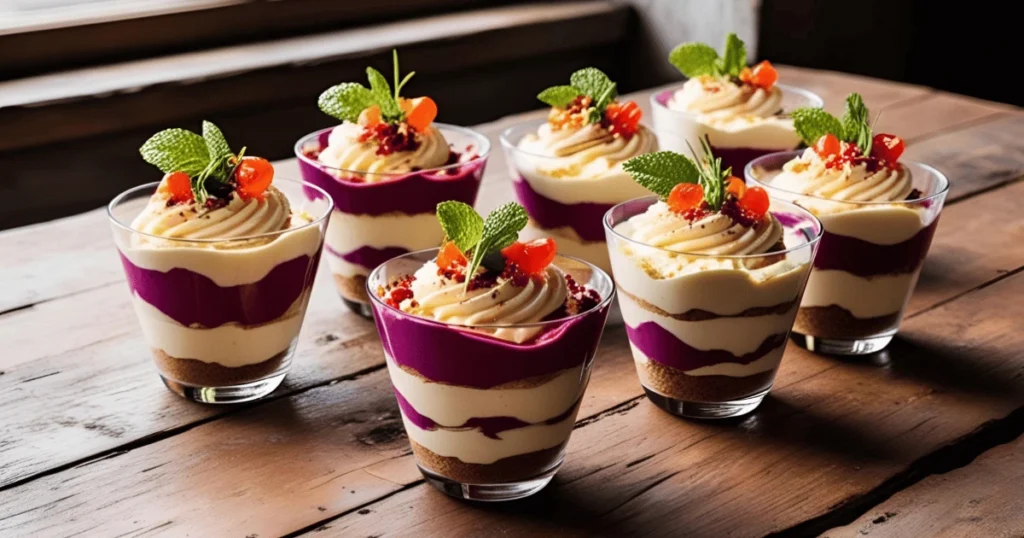
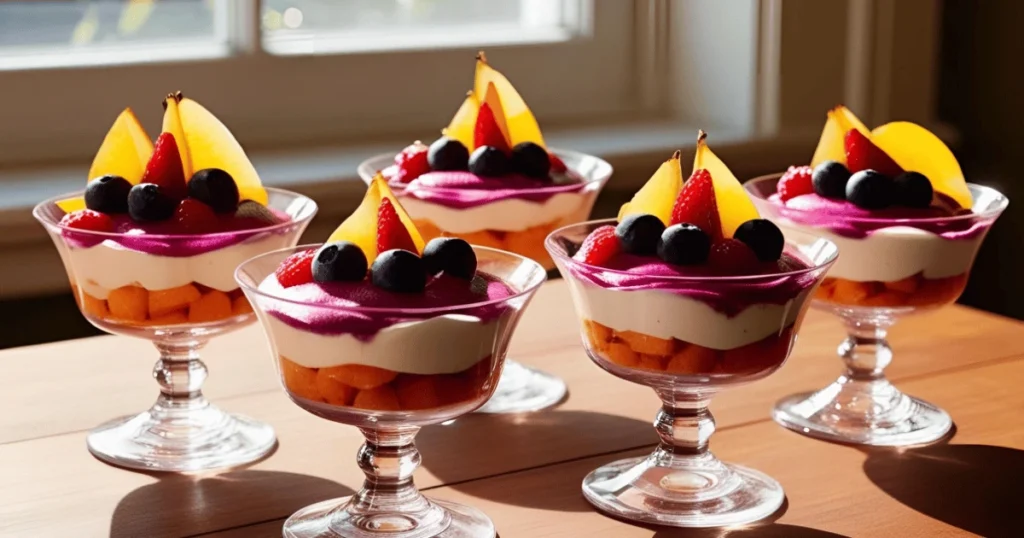
- Showcase Layers: Serve in clear glassware like mason jars, stemless wine glasses, or mini trifle dishes. The visual appeal of the crust, filling, and fruit will impress guests before they even take a bite.
- Garnish with Flair: Add a sprig of fresh mint, a dusting of cocoa powder, or edible flowers (like pansies or lavender) for a gourmet finish.
- Texture Contrast: Sprinkle crushed nuts, toasted coconut, or brittle pieces on top for a crunchy contrast to the creamy layers.
Occasion-Specific Ideas
1. Casual Family Dessert
- Serve in reusable plastic cups for mess-free enjoyment.
- Let everyone customize their own cups with a topping bar: whipped cream, chocolate sauce, sprinkles, and sliced bananas.
2. Holiday Gatherings
- Use seasonal fruits: cranberries and oranges for Christmas, peaches for summer BBQs, or spiced apple compote in fall.
- Add themed garnishes: crushed peppermint for winter, candy hearts for Valentine’s Day, or gold leaf for New Year’s Eve.
3. Brunch or Baby Showers
- Miniaturize the cups into shot glasses for bite-sized treats.
- Pair with a bubbly drink like prosecco or sparkling lemonade.
4. Lunchbox Treats
- Pack in portable containers with airtight lids.
- Opt for non-messy toppings like granola or mini chocolate chips.
Pairing Recommendations
- Coffee or Tea: The creamy, sweet layers balance bitter espresso or herbal teas like chamomile.
- Dessert Wines: Try a late-harvest Riesling or Moscato for a luxurious pairing.
- Fresh Smoothies: Serve alongside a berry or mango smoothie for a fruity duo.
Temperature Tips
- Serve chilled but not ice-cold. Remove cups from the fridge 10–15 minutes before serving to soften the filling slightly.
- For outdoor events, keep cups nestled in a bowl of ice to maintain freshness.
Dessert Board Twist
Turn individual cups into a shareable spread:
- Arrange a large platter with a bowl of crust crumbs, filling in a piping bag, and assorted toppings.
- Let guests build their own cups buffet-style.
With these ideas, your Gense Dessert Cups can shine at any event—from weeknight dinners to milestone celebrations. The key is to lean into the recipe’s flexibility and let your creativity (or your guests’ preferences) lead the way!
7. Conclusion
The Gense Dessert Cup proves that extraordinary desserts don’t require hours in the kitchen or advanced skills. With its no-bake simplicity, endless adaptability, and eye-catching layers, this recipe is a game-changer for anyone craving a fuss-free treat that feels indulgent. Whether you’re meal-prepping snacks for the week, hosting a dinner party, or letting kids unleash their inner pastry chef, these cups deliver joy in every bite.
What makes this dessert truly special is its ability to evolve with you. Swap ingredients based on the season, your dietary preferences, or whatever’s lingering in your pantry. Turn it into a cozy winter treat with spiced apples and caramel, or keep it light and fresh with summer berries and citrus. The only limit is your imagination—and maybe the size of your dessert cups.
So grab those glasses, jars, or bowls, and start layering. Once you taste the buttery crust, velvety filling, and juicy fruit harmonizing in every spoonful, you’ll understand why this recipe earns a permanent spot in dessert rotations everywhere.
Your Turn!
Try the Gense Dessert Cup this week, and share your creations with friends—or tag us on social media. We’d love to see how you make it your own!
8. FAQs
1. How long can I store Gense Dessert Cups?
Store assembled cups (without fresh toppings) in airtight containers in the refrigerator for up to 3 days. Add berries, chocolate shavings, or other garnishes just before serving to maintain texture.
2. Can I make this recipe vegan?
Absolutely! Use dairy-free cream cheese, coconut cream instead of heavy whipping cream, and a plant-based butter or coconut oil for the crust. Ensure cookies (like Oreos) are vegan-friendly if swapping the graham cracker base.
3. What can I use instead of graham crackers?
Try crushed gluten-free cookies, Oreos, pretzels, or a mix of nuts and dates. For a grain-free option, almond flour blended with melted butter or coconut oil works well.
4. Why is my filling too runny?
This usually happens if the cream isn’t whipped to stiff peaks or the cream cheese isn’t fully softened. Chill the filling for 15–20 minutes before layering, or add 1 tbsp cornstarch to stabilize it.
5. Can I freeze these dessert cups?
Freezing isn’t recommended. The filling may separate and become grainy when thawed, and fresh fruit will lose its texture. Stick to refrigeration for best results.
6. How do I prevent the crust from crumbling?
Press the crust mixture firmly into the cups using the back of a spoon or a flat-bottomed glass. Chilling the cups for 10 minutes before adding the filling also helps set the base.
7. Can I use frozen fruit instead of fresh?
Yes, but thaw and drain frozen fruit thoroughly to avoid excess moisture. Pat it dry with a paper towel before layering to prevent soggy crusts.
8. What’s the best way to serve these at a party?
Prep cups 1 day ahead and refrigerate. Set up a topping bar with sauces, sprinkles, and fresh fruit so guests can customize their desserts.
9. Are these cups kid-friendly?
Yes! Kids love assembling their own layers. Use allergy-safe ingredients (e.g., sunflower seed butter instead of nuts) and let them pick fun toppings like mini marshmallows or crushed cookies.
10. Can I make a larger batch for a crowd?
Double or triple the recipe easily! Use a 9×13 dish to create a layered dessert “bars” version, or prepare individual cups in bulk for parties.